VuePress 快速上手指南
前段时间,尤雨溪发布了一款基于 Vue 的静态网站生成器 VuePress ,可谓火极一时。其为编写技术文档而优化的默认主题也让人非常喜爱,遂决定将 MP-WeUI 的文档重新使用 VuePress 生成。
安装预览
安装 VuePress
npm install -D vuepress
在项目根目录下创建 docs 文件夹,用于存放文档 md 源文件,并在 docs 文件夹根目录下创建 readme.md 文件,用于配置文档首页信息,查看详情
---
home: true
actionText: 开始 →
actionLink: /components/agree
footer: MIT Licensed | Copyright © 2018 独孤求败
---
配置 package.json
{
  "scripts": {
    "docs:dev": "npx vuepress dev docs",
    "docs:build": "npx vuepress build docs"
  }
}
预览
npm run docs:dev
自定义配置
在 docs 文件夹下创建 .vuepress 文件夹,通过必要的 .vuepress/config.js 对网站进行配置
module.exports = {

  // 如果你计划发布的站点是在某个仓库下,比如 https://github.com/youngluo/mp-weui ,则 base 需要指定为 /mp-weui/
  base: '/mp-weui/',

  // 站点标题,在默认主题中会显示在导航栏左侧
  title: 'MP-WeUI',

  // 站点描述,将会在 HTML 中渲染为 <meta> 标签,在默认主题中会显示在首页上
  description: '基于 mpvue 和 weui-wxss 的微信小程序 UI 库',

  // 在 <head> 标签中自定义额外标签
  head: [
    ['meta', { name: 'keywords', content: 'mpvue,weui,mp-weui' }],
    ['link', { rel: 'icon', href: `/favicon.png` }]
  ],

  serviceWorker: true,

  // 配置 google 分析统计
  ga: '',

  themeConfig: {
    repo: 'youngluo/mp-weui',

    docsDir: 'docs',

    // 禁止提取 h2, h3 标签链接到侧边栏中
    sidebarDepth: 0,

    nav: [
      { text: '组件', link: '/components/agree' }
    ],

    sidebar: {
      '/components/': genSidebarConfig()
    }
  }
}
如果需要在站点中提供一些静态资源,比如 favicons 或者 PWA icons,你可以将它们放在 .vuepress/public 下,它们将会被复制到生成文件夹的根目录下
打包
执行命令
npm run docs:build
打包文件默认会输出到 .vuepress/dist
发布到 GitHub
创建 deploy.sh
#!/usr/bin/env sh

set -e

npm run docs:build

cd docs/.vuepress/dist

# if you are deploying to a custom domain
# echo 'www.example.com' > CNAME

git init
git add -A
git commit -m 'update docs'

git push -f git@github.com:youngluo/mp-weui.git master:gh-pages

cd -
配置 package.json
{
  "scripts": {
    "deploy": "bash deploy.sh",
  }
}
最后执行 npm run deploy 将打包后的文件推送到 github gh-pages 分支
GitHub Pages 配置
在 github 仓库中点击 Settings 选项卡

将页面滚动到 GitHub Pages,将 Source 选择为 gh-pages branch
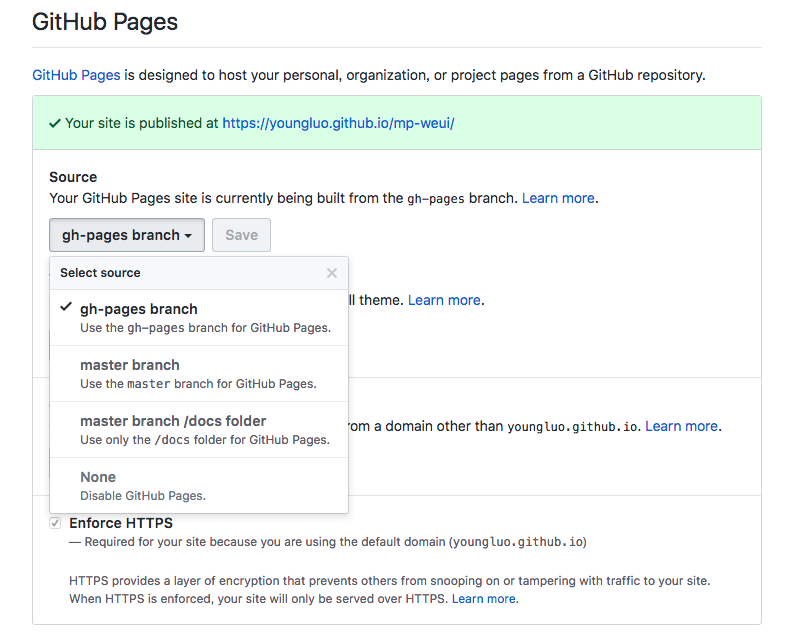
大功告成!预览示例